- 01Principles
- 02Network
- 03Heating
- 04Cooling
- 05Lighting
- 06Shading
- 07Security
- 08Garden, gates
- 09Appliances
- 10Energy
General installation principles
These few rules apply to every area. Get them right and the rest is just a matter of choosing devices; miss them and you will be opening up walls later.
Installation requirements
- Behind every indoor light switch, roller shutter switch and socket, install a deep, 65 mm junction box.
- Behind sockets: AC 230 V phase (L), neutral (N) and protective earth (PE). At switches, L and N are sufficient — PE is not required there.
- In the box, keep splices to a minimum : space is tight and the smart relay has to fit. For connections, stranded wire is preferred.
- Put only one relay behind each junction box — to prevent overheating.
- Conduits must be oversized: main runs need min. 32 mm; where UTP or coax runs, 30 mm is mandatory.
- The low-voltage cabling (DC 12–24 V, coax, UTP) must always run in its own conduit, separate from the AC 230 V wiring.
- Key devices (central unit, NVR, alarm) should preferably be on a separate, dedicated AC 230 V circuit; recommended: Type A RCD, max. 30 mA.
- In the distribution board, leave at least +30% spare space — for ventilation and future expansion.
- Surge protection on every UTP endpoint, on both the incoming and outgoing side, coordinated with the equipotential bonding (EPH) and the lightning protection system.
- Structured cabling defaults to CAT6A; the contractor must label every cable during construction.
- Recommended: a separate IoT VLAN/SSID for smart devices.
Devices
No devices are chosen at this level yet — these requirements are the same for every manufacturer. If the electrician follows them, you are free to choose the control system later.
Network and smart home hub
The backbone of the system: the internet connection, the location of the central unit, and the network everything else connects to. The primary supported platform is TP-Link Omada.
Installation requirements
- Ask your internet provider for the property's connection point — the junction box must be positioned accordingly.
- Provide the central unit's room with a UTP and/or coax cable outlet, and run the cable of every device that communicates over UTP or coax back to this room.
- A dedicated AC 230 V circuit for the central unit; the house's main server and switch should preferably be on a separate circuit.
- The rack needs a properly sized AC 230 V circuit (min. 13 A) and a standard equipotential bonding (EPH) connection , with adequate ventilation.
- For TVs and workstations, a dual UTP outlet is recommended.
- The central unit should go in a weather-protected, temperature-stable room.
Devices
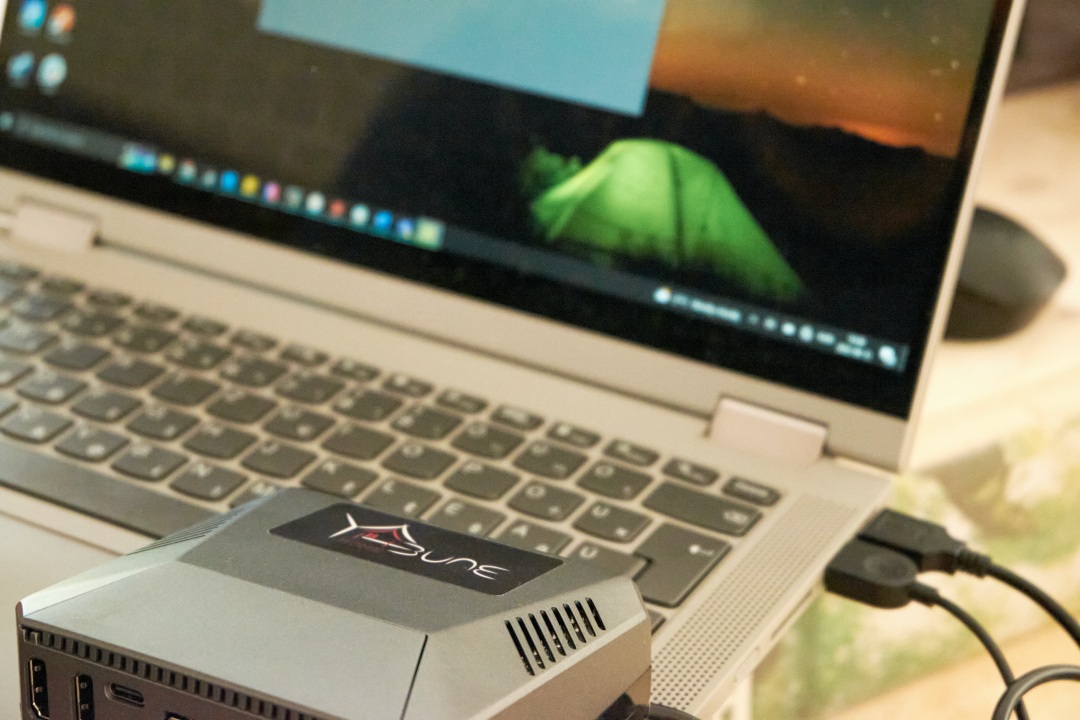
- Smart home hub: Yabune Home central unit
- Network controller: TP-Link Omada OC200 / OC300, or Omada Cloud Essentials
- Gateway: Omada gateway (ER707-M2; ER605 for smaller setups)
- Access point: Omada EAP653 ceiling-mount, EAP650 Outdoor for outdoor use — min. 1 unit per 40 m². For Wi-Fi 7: EAP772/773
- PoE switch: Omada (e.g. TL-SG2218P for the rack), sized for the combined PoE load of cameras and APs
- Surge protection: ETH-SP-G2 on all UTP endpoints
- Rack: 19″, min. 9U (depends heavily on what goes in it)
- UPS: Legrand Keor, min. 800 VA
Heating
Zone-based, thermostat-driven control: the system controls and monitors the entire hydronic side of the HVAC system — pumps, valves, mixing valves, manifold — with room-by-room temperature control.
Installation requirements
- HVAC control panel (e.g. 2×12 modules) near the rack, on a dedicated, protected AC 230 V / min. 13 A circuit.
- The components to be controlled (pumps, valves, mixing valves, thermoelectric actuators) are best wired back to a single panel.
- Every circuit of the manifold gets a thermoelectric actuator, powered from the HVAC control panel.
- The wet-room circuits stay open at all times — to prevent hydraulic lock.
- Emergency switch next to the control cabinet: if the control system fails, it starts the underfloor heating pump manually.
- Per zone: a thermostat location, plus temperature sensor locations on the supply/return lines.
Devices
A — Computherm + Shelly (open, Yabune-preferred)
- Zone controller: Computherm Q4Z or Q10Z (4 or 10 zones)
- Thermostat: Computherm E280 / E300 / E400RF; E300FC for fan coils
- Relay control: Shelly Gen4 / Pro for the pumps, valves, mixing valves and the heat source signal
- Freely programmable, multi-stage logic; full monitoring; expandable
B — Honeywell evohome (closed system)
- Resideo evohome color Wi-Fi zone controller, HR92 radiator controllers, HCC100 / HCE80 underfloor heating zone controller
- Factory-made, integrated ecosystem, quick installation — in exchange, more closed and less customizable
Ventilation (heat-recovery)
- Runs on its own controller; with a dedicated UTP outlet it can be integrated via Modbus or IP
- Recommended: Helios, Zehnder
Cooling and air conditioning
Three typical solutions, often combined: split air conditioning, surface (ceiling/floor) cooling and fan coils. Hydronic cooling builds on the heating system and uses its control logic.
Installation requirements
- Split air conditioner: proper condensate drainage, and for the indoor unit a dedicated AC 230 V circuit. The location of the outdoor unit should be agreed in advance with the air conditioning installer.
- Surface cooling: via the heating manifold, with chilled water. Dew point monitoring is mandatory, so a humidity sensor in each room is required.
- During cooling, the underfloor heating pump is disabled; cooling water only circulates in the permitted circuits.
- Fan coil: two-way valve and (auxiliary) pump, fan speed control, condensate drainage. Power supply and fan speed wiring come from the HVAC control panel.
Devices
- Split air conditioner: Daikin Perfera (FTXM-R "All Seasons"), current Gree or Midea series. Integration via built-in Wi-Fi or IR control (Shelly + IR / Sensibo)
- Fan coil, water side: Shelly Pro 4PM (two-way valve + pump), Shelly 2PM Gen4 (mixing valve), zone thermostat Computherm E300FC
- Surface cooling: humidity sensor per room + Computherm Q4Z/Q10Z + thermoelectric actuators
Our solutionSmart heating and cooling
On the blogMaking an air conditioning system smart with Modbus
Exterior and interior lighting
Every light keeps its physical switch and can also be controlled via a smart relay, dimmer or LED controller. This section decides whether the lighting can be made smart later at all without opening up the walls.
Installation requirements
- Every light needs a physical switch point: deep junction box, with phase (L) and neutral (N) at the switch.
- Outdoors, if there is no switch, the space behind the light fixture needs adequate box depth and cable layout.
- For two-way and multi-way switching, a push-button (momentary) approach is recommended: the relay input receives a pulse, so the light can be switched from any number of points, and brightness and scenes can be controlled as well.
- With LED strips, dimming is done on the DC side (12/24 V), not on the AC side: the driver runs on AC 230 V, and the dimmer controls the driver's DC output. The power supply must be sized for the load.
- For inductive loads (iron-core transformer, motor), a snubber is required for reliable switching and to protect the relay.
Devices
- Single point / two-way / socket: Shelly 1 Gen4 or 1PM Gen4 (Mini for tight boxes)
- Two loads in one box: Shelly 2PM Gen4
- Many circuits in one place: Shelly Pro 4PM for DIN rail, 4 channels
- Dimmer: Shelly Dimmer Gen3 (trailing edge). LED max. 150 W, incandescent/halogen 200 W, transformer 200 VA; bypass below 20 W
- 0–10 V driver: Shelly Dimmer 0/1-10V PM Gen3
- Color LED strip: Shelly Plus RGBW PM — 12 V: 45 W/channel (max. 144 W), 24 V: 90 W/channel (max. 288 W)
- Scene control: Shelly i4 — predefined lighting scenes for each switch
- Inductive load: Shelly Snubber
Our solutionSmart lighting
On the blogThe secret superpower of smart lights · Making sockets and light switches smart
Shading
Roller shutters, venetian blinds and outdoor shading (screens, pergolas) alike — provided that the motor is switch-controlled, i.e. it can be moved by up/down switching and is not a closed, proprietary system.
Installation requirements
- Every shading device needs a switch point, under the same conditions as lighting: deep junction box, phase (L), neutral (N).
- If this is not possible: next to the roller shutter, a 100×100 junction box, 20 cm below the ceiling, on an interior wall of the property.
- A two-position (up/down) push button is recommended.
- Optionally, split across two separate AC 230 V circuits — so a fault on one circuit does not disable all of them.
- The patio door roller shutter can be one or two physical units, but must be controlled as one.
Devices
- Primary: Shelly 2PM Gen4 in roller shutter/venetian blind mode
- Alternative: DD7006A bidi module
- For a closed system: Somfy TaHoma box (for Somfy io/RTS motors)
- Accessories: roller shutter motor, two-position push button
Our solutionSmart shading
On the blogMaking roller shutters, garage doors and irrigation systems smart
Security systems
Four parts: outdoor cameras, outdoor motion sensors, alarm system, and smoke/CO and burst pipe detection. The alarm and the camera system run on separate, dedicated circuits.
Installation requirements
- Camera: a dedicated, standard UTP run to the junction box in the wall is enough — the cameras are PoE-powered, so no separate AC or DC outlet is needed.
- The junction box can be recessed into the insulation (min. 80 mm diameter, 50 mm depth); where that is not possible, use a surface-mounted box on a solid base.
- Cameras are powered through the switch, with UPS backup; ideally they should cover each other (tamper protection).
- The NVR goes in the central rack, in the protected room, powered from the UPS.
- Motion sensor: DC 12 V power supply; the dry contact signal must be routed to the rack cabinet.
- Alarm: standard alarm outlet + dedicated UTP; on a separate circuit, with each sensor on a separate zone, wired individually.
- The alarm control panel goes in the protected room, with a box above it housing the battery, the GSM module and, if required, an IP module, with a chased-in cable route. Keypad at the entrance.
- Every door and window gets an opening sensor (6-core alarm cable).
Devices
- Camera: Reolink RLC-811A / RLC-1212A / CX820 (ColorX) + RLN16-410 PoE NVR, or Hikvision AcuSense
- Alarm control panel: Paradox (EVO/SP/MG) or DSC PowerSeries Neo + IP/GSM module. For wireless needs, Ajax Hub 2 Plus is an alternative
- Sensors: Paradox/DSC-compatible opening and motion detectors + control panel
- Smoke / CO: Shelly Smoke Gen + standalone CO detector compliant with EN 50291
- Burst pipe: Shelly Flood Gen3 + motorized main shut-off valve — automatic shut-off in case of a water leak
Camera surveillance — legal framework
Private individual (Hungarian Civil Code and GDPR)
- Only your own property may be monitored.
- Cameras must not view other properties or public areas — if this cannot be solved by adjusting the camera, that area must be masked.
- At the entrance, you must indicate that the area is under surveillance.
Condominium
- Approval by two-thirds of the owners is required.
- A data protection statement under the house rules (SZMSZ) is also required.
- The system is operated by an external company with an official license .
- The installation must be reported.
Garden, gate, entrances, irrigation
Door intercom, motorized gate and garage door, irrigation system. All control signals run back to the central rack — this cabling must be laid before landscaping.
Installation requirements
- Door intercom: for both the indoor and the outdoor unit, a separate UTP outlet each. For the magnetic lock, DC 12/24 V power; the outdoor unit interrupts the lock's power to release it.
- Gate and garage door motor: in addition to the usual AC 230 V supply, 1 UTP or 6-core alarm cable for control.
- Cabling from the gate to the central unit is required; the gates should preferably be on a separate circuit.
- Irrigation: standard AC 230 V and DC 24 V outlets, agreed in advance with the contractor.
- The controller module can go outdoors or indoors — indoors is recommended — and IP connectivity is a must.
Devices
- Gates: gate motor with NO input + Shelly 1 Gen4 (potential-free) + outdoor opening sensor
- For swing gates / pedestrian gates: opening sensor
- Irrigation: our own Yabune Sprinkler, or a Hunter Hydrawise or Rain Bird Wi-Fi module
- In a Shelly-based setup, the Shelly Pro 3 can also control the zones
Our solutionSmart garden
On the blogMaking roller shutters, garage doors and irrigation systems smart
Household appliances and robots
We do not set general, upfront installation requirements for this area.
Installation requirements
- The range of built-in household and robotic devices, their communication capabilities and integration options vary enormously by manufacturer and model.
- The required cable outlets and the integration method therefore always require project-level coordination.
- A typical point to clarify during the consultation: unobstructed movement for robot vacuums — we recommend omitting thresholds and keeping level differences at floor transitions to a minimum.
Devices
- Bring a list of the appliances you plan to install to the consultation — down to the model. From there, we can tell you what can be integrated and what needs a cable outlet.
Our solutionSmart household appliances
On the blogSmart robot vacuum with Home Assistant
Energy and metering
Electricity, water, gas and — where available — solar generation. Metering can be done both at the whole-house level (total consumption) and locally (per circuit or per device).
Installation requirements
- Water: the preferred solution is a pulse-output water meter. For new builds, a pulse-output meter can be requested from the water utility; otherwise, a pulse-output submeter installed after the existing meter is also suitable.
- Gas: the same principle — a pulse-output gas meter, in compliance with regulatory and metrological verification requirements.
- Solar PV: the integration method depends on the inverter type; we recommend a dedicated UTP outlet for the inverter to enable IP or Modbus integration.
- DHW: the heating element is switched via a contactor from the apartment's distribution board; the circulation pump via a relay.
Devices
- Electricity, whole-house: SmartWizard P1 from the P1 port of the smart meter, or Shelly Pro 3EM after the meter
- Electricity, local: Shelly PM types (1PM, Plug S PM)
- Water and gas: pulse-output meter + Shelly 1 Gen4 + Add-on for counting pulses
- DHW: Shelly relay + contactor
Our solutionSmart energy use
Wiring diagrams
We do not reproduce wiring diagrams — the manufacturer's documentation is always more up to date. The links below take you directly to the official diagrams and installation guides.
Lighting and shading
- Roller shutter motor with one or two momentary (bell-push) switches — Shelly 2PM Gen4
- Double-pole switch — Shelly 1 Gen4
- Two-way switching with a push button — Shelly 1 Gen4
- Two-way changeover switch — Shelly 2PM Gen4
- Multi-way switching with 3 push buttons — Shelly 1 Gen4
- Push-button (momentary) wiring — Shelly 1 Gen4
LED control
- Single-color LED strip — Shelly Dimmer Gen3
- CCT, RGB, RGBW and RGBWW strip — Shelly Plus RGBW PM
- 0–10 V LED driver — Shelly Dimmer 0/1-10V PM Gen3
- Wiring a scene controller — Shelly i4 Gen4
HVAC (heating and cooling)
- HVAC control panel — Shelly Pro 4PM
- Mixing valve control (Cover mode) — Shelly 2PM Gen4
- Measuring points (Add-on, DS18B20) — Shelly 1 Gen4
- Heat pump Modbus (RS485) — Shelly knowledge base
Thermostats and zone controllers
- Computherm zone controller — Q4Z · Q10Z
- Computherm thermostat (E280 / E300 / E400RF) — E300 guide
- Honeywell evohome zone controller and HR92 — evohome installation guide
Standards and platform principle
Referenced standards and legislation
- MSZ HD 60364-7-701:2007 — electrical design of wet areas (bathroom, shower).
- MSZ EN 62305 — lightning and surge protection (LPS/SPD).
- Hungarian Civil Code (Ptk.) and GDPR — camera surveillance for private individuals and condominiums.
- Condominium house rules (SZMSZ) and data protection statement — for operating a shared camera system.
- EN 50291 — carbon monoxide detector.
Platform principle
- The primary supported platform for the low-voltage network is TP-Link Omada; deviating from it is recommended only after prior agreement.
- Control — where technically justified — is primarily implemented with Shelly Gen4/Pro devices. Yabune is an official Shelly partner.
- In niche areas (cameras, alarms, air conditioning, zoned heating), we continue to recommend the brand best suited to each area.
Partners
Yabune Home's solutions are built on the products and expertise of proven, reliable partners.
Smartopert Kft.
Brand-independent smart home expertise for users and professionals (since 2019). Smart home installer training and online courses, with training centers in Szeged and Budapest. They are also behind the "Okosotthon kalauz" (Smart Home Guide) book series.
smartopert.com · okosotthon.guruShelly
Manufacturer of the smart relays and sensors that form the backbone of our control systems (Shelly Group). Yabune is an official Shelly partner.
shelly.comOkosOtthon Bolt / MarketCom
Official distribution in Hungary: OkosOtthon Bolt with in-stock retail supply of Shelly products, and MarketCom Kft. as the Sonoff/Shelly wholesale partner for specialist dealers and installers.
okosotthon.bolt.hu · marketcom.huQuantrax — Computherm
Computherm is a manufacturer of thermostats and zone controllers: a Hungarian-owned company based in Szeged, founded in 1994.
computherm.infoAre you building or renovating?
Let's review your plans together before the electrician runs the cables. In the consultation, we go over which areas are worth preparing now and which can wait — and put together a specific bill of materials for your project.