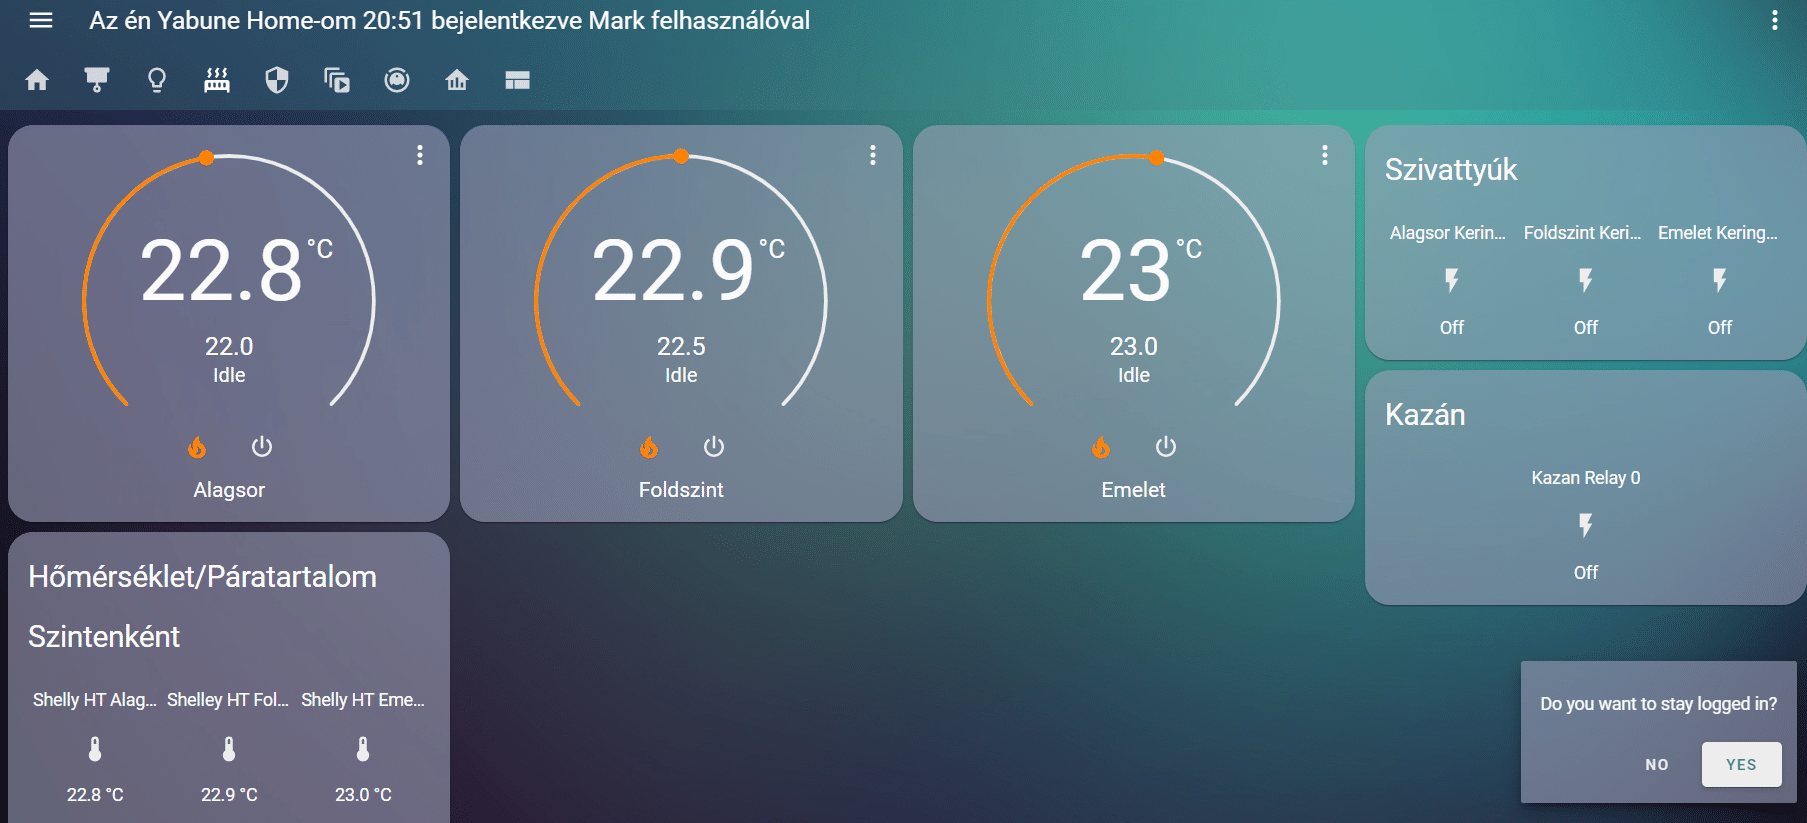

Recently, we received a request to upgrade the heating system of a 3-story garden house built in the 1980s. Just because a house is not new and modern does not mean that it cannot be turned into a smart home. In the following case study, we will show how, with the right smart home solutions, we can also upgrade our outdated heating system. If a new boiler or even the entire underfloor heating is renovated later, the existing system can be easily adapted.
Our client bought the property 1 year ago, and based on what he experienced last winter, he wanted the heating of the huge living area (nearly 320 sq m) to be a little more optimal and comfortable. Although he is an experienced technician, our client, as a large family man, not only earns money, but also has a large family, so he decided to entrust the smartening of his home to professionals. He could not have chosen better. The project became a bit urgent due to the arrival of frost, but the Yabune team stood up for themselves and after the contract was signed on Wednesday, the family, the head of the family, could spend Saturday evening in a pleasantly automated and heated home, to the greatest satisfaction of the family. However, let's get back to the subject and the details of the implementation. First, let's look at what the available heating system was.
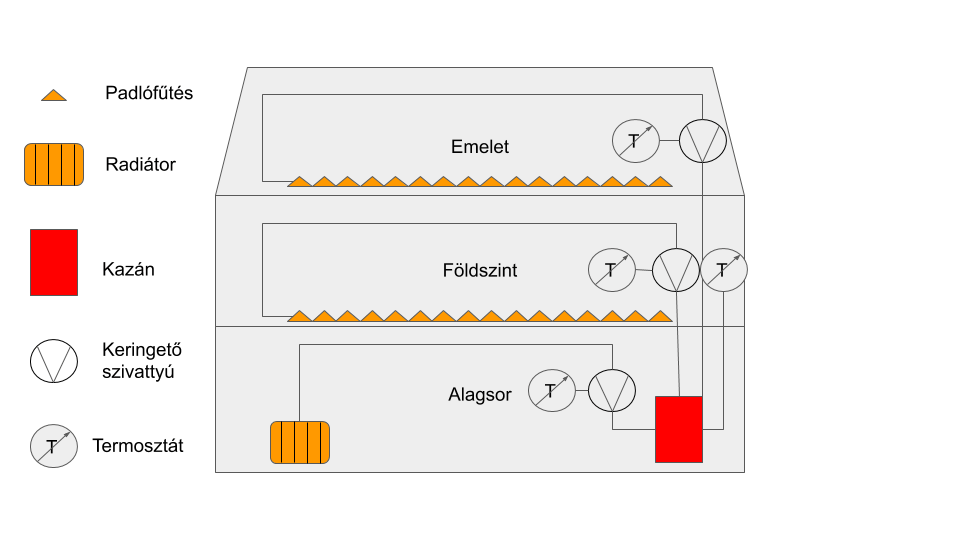
The basic setup was that next to all the boilers in the basement there is a pump that circulates hot water to the radiators. On the ground floor there is a circulation pump on the floor heating manifold and similarly on the first floor. The pumps are controlled by a manual thermostat on each floor, and a radio Siemens thermostat and relay located on the ground floor switches the boiler. So to turn on the heating, we first turn down the thermostat on the given floor, and then set the boiler thermostat. Special attention must be paid to ensuring that if none of the pumps on the floors are running, the boiler does not run either, as its own pump would sooner or later be damaged due to the increasing pressure. The challenge is to develop an appropriate and reliable control logic within a tight deadline, and without replacing the entire heating system, reusing the existing machinery as much as possible.
In consultation with our client and after accurately assessing his needs, we decided to install a Shelly-based solution, since the building already had good WiFi coverage thanks to the Unifi system. We installed a total of 4 WiFi relays, one for each pump and one for the boiler control. We tried to hide the Shellys in junction boxes as aesthetically as possible. We chose the Home Assistant-based Yabune Home solution for the control center, since this is where we can implement unique solutions most easily and guarantee long-term reliability.
First, we installed the boiler control. The boiler was renovated a few years ago, but the mechanical system in the basement still had a rather „old school” feel. The boiler was slightly undersized compared to the home. Replacing it was not an option, so we had to get the most out of it with a control.
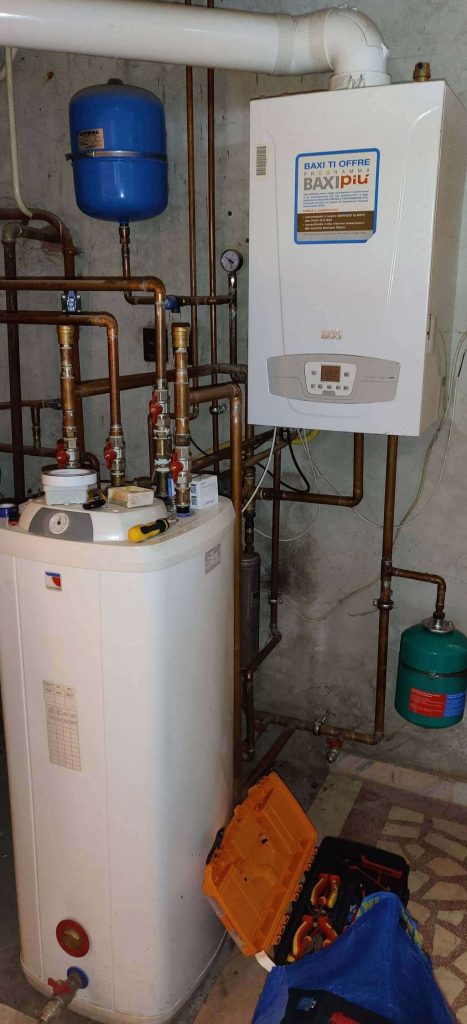
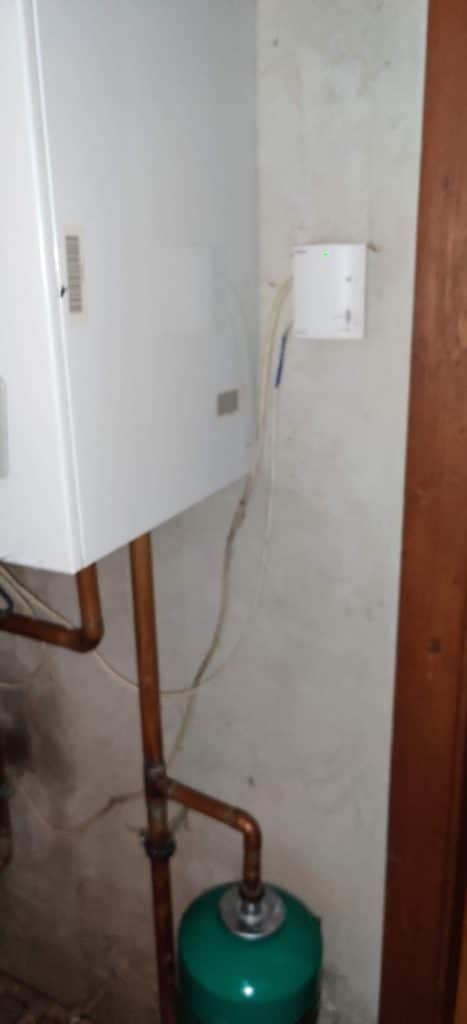
The boiler was controlled by a wall-mounted Siemens radio relay. We replaced this with Shelly.
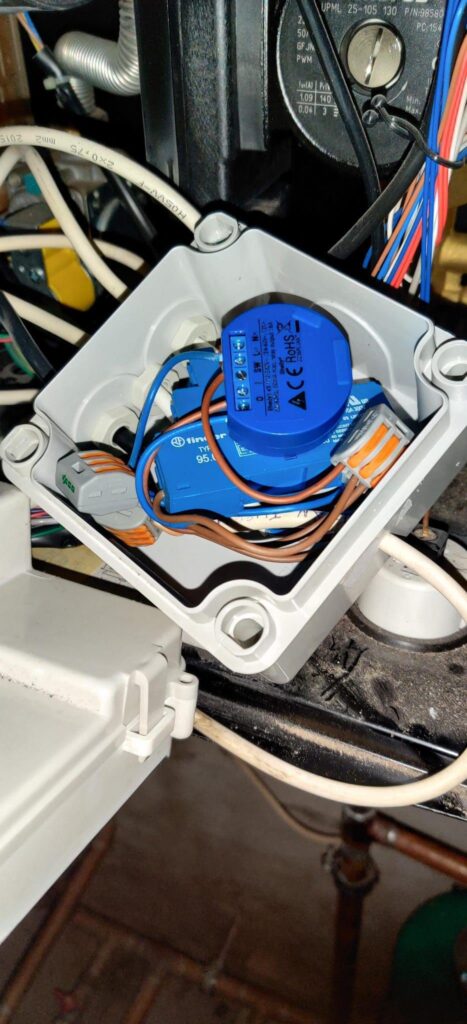
After the boiler control was in place, the manifolds and the pumps mounted next to them could come in. The devices were controlled by manual thermostats. After we removed them from the wall, we also encountered astonishing electrical installation solutions.
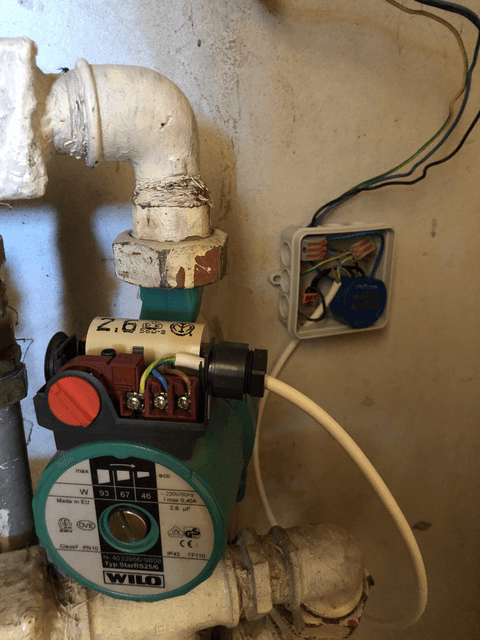
After installing the other two Shellys, we put the Shelly H&Ts into operation in the most important rooms so that we could control the regulation based on them. The next step was to install and configure the Home Assistant-based Yabune Home system in the customer's own proxmox-based environment. We configured the Shelly H&Ts as Generic thermostats on the HA interface. Then we wrote the necessary automation for heating control and configured the graphical interface. On this, we displayed the measurement values of the H&Ts, the status of the pumps and boiler relays, and the 3 generic thermostats responsible for controlling the three levels.
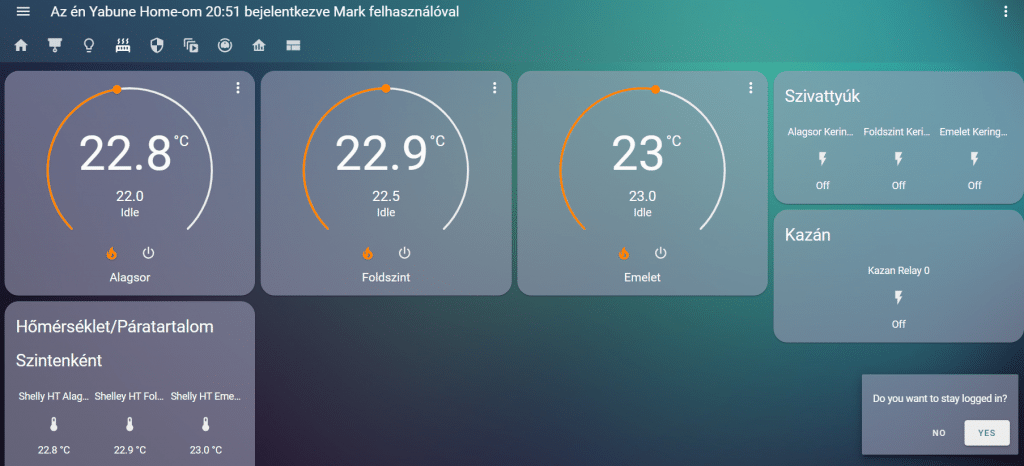
This took about 30 minutes, then we tested the process and assessed whether everything was working according to the customer's needs. In the next 24 hours, we monitored the operation of the system closely to ensure its stability. Our customer's satisfaction with the start of the heating season means happiness for us too.
Home Assistant is one of the most versatile open source systems on the market, but there are problems with its stability. The solution from the Yabune Home team allows the operation of the center by increasing its stability and careful testing. We continuously test all Home Assistant versions together with the individual components we support in our own test environment, so we can make sure that we can offer our customers a quality service. Our solution can also help hobbyists, as our professional staff has significant experience in the field of Home Assistant and Home Automation. Furthermore, regular backups provide a stable lifeline for more adventurous customers.
Are you interested in how we can modernize your home? Click